Many Mac users encounter two common issues when attempting to boot their Mac into recovery mode. First, their Mac may not start up in recovery mode at all. Second, if it does start, it might not function correctly. This can be problematic as it prevents users from restoring to an earlier macOS version or troubleshooting startup disc failures.
Recovery mode may fail to work due to various reasons, but the good news is that there are multiple solutions to successfully boot your Mac into recovery mode. In this post, we will explore some straightforward fixes to address this problem.
It’s worth noting that recovery mode was introduced with OS X Snow Leopard, so if your MacBook is older, you will need to use your original OS X disk to reinstall the operating system.
Table of Contents
What Should You Do When Mac Won’t Boot Into Recovery Mode?

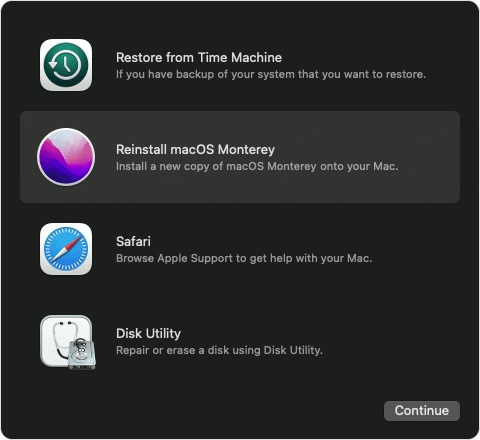
In any case, if your Mac isn’t booting into recovery mode, you may have to reinstall macOS using the Mac Internet Recovery. To do that you need to restart your Mac and hold the Option(⌥)/Alt + Command(⌘) + R keys simultaneously while restarting. The macOS Utility window will appear through which you can reinstall the available OS.
If your MacBook Pro, MacBook Air or M1 Mac won’t enter recovery mode, attempt the following fixes to identify the potential problems. After that, you can successfully start your Mac in macOS Recovery Mode.
Mac Won’t Boot Into Recovery Mode: Simple Steps to Fix It
There are several ways to get your Mac boot into recovery mode. You will find the different methods, along with their sets of steps, below:
Method 1: Running the Time Machine Back-Up
If you’ve previously backed up your Mac using Time Machine, this method could be your saviour. Follow these steps to boot your Mac into recovery mode through Time Machine Back-Up:
- Power down your Mac and connect the Time Machine backup disk (external storage device with backups).
- Simultaneously press and hold the Option key (⌥) along with the Power button.
- Release the Option key when the Startup Manager screen.
- Opt for an earlier backup drive and click Return.
- Upon booting, an OS X installer screen emerges, offering the chance to restore data from a backup.
Read More: How To Factory Reset Your MacBook Air
Method 2: Reinstalling macOS via Mac Internet Recovery
Reinstalling macOS from Apple’s server through Internet Recovery can also alleviate your troubles, provided you have a robust Internet connection. Follow these steps:
- Power off your Mac.
- As you power on, hold the Option(⌥)/Alt + Command(⌘) + R keys simultaneously.
- Keep holding until a progress meter (revolving globe logo) appears along with “Starting Internet Recovery.”
- Wait for the loading progress bar to complete.
- The macOS Utility window will grace your screen.
- Choose Reinstall macOS utility and proceed with the OS version reinstallation.

Method 3: Crafting a Bootable Installer
In the absence of an original OS installer disc and if Internet Recovery faces connectivity snags, creating a bootable USB drive becomes an invaluable alternative. Perform the following steps:
- First, connect a USB device that is at least 32GB in capacity and has been erased and its format set as Mac OS Extended using the Disk Utility App on the Mac.
- Download the setup file for macOS. To do that, choose a properly functioning Mac and download its most recent macOS from the App Store, such as Catalina.
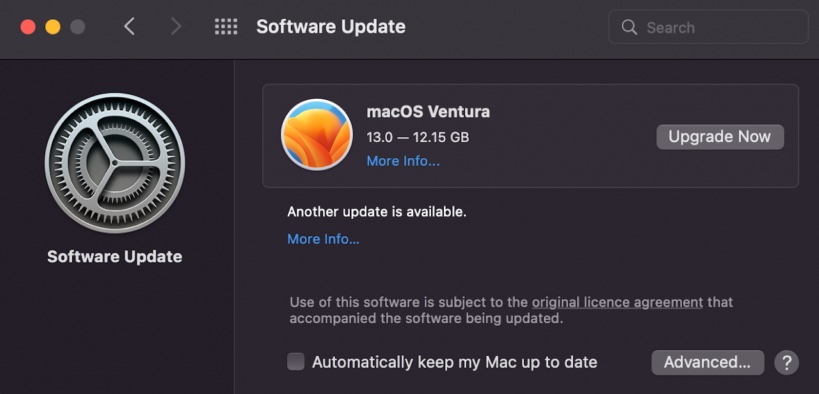
- Go to System Settings > Software Update to get the latest version. You can then download the macOS installation files. By default, the installation files are located in the Application folder.

- Enter macOS Recovery Mode > Startup Security Utility > check Allow booting from external media if your Mac has an Apple T2 or M1 chip (verify in Apple menu > About This Mac).
- Connect the Mac to the USB drive.
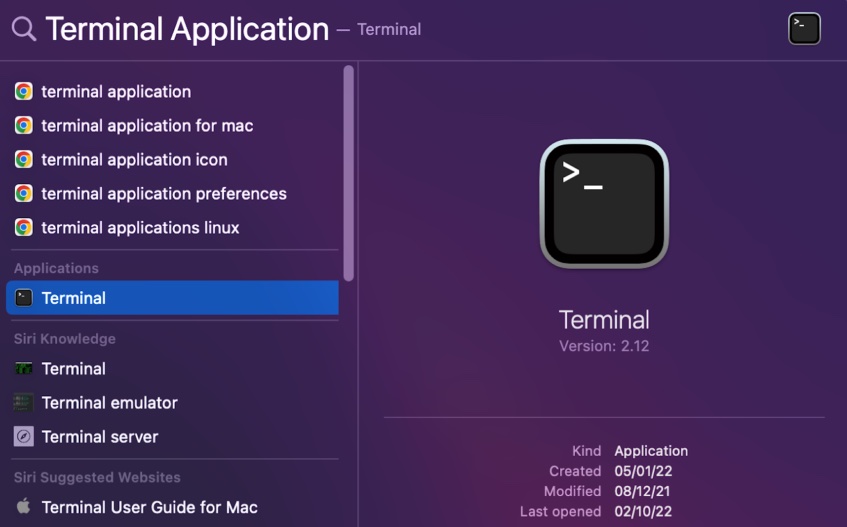
- Launch the Terminal via the launchpad.
- Press Enter after typing one of the following commands in Terminal. Note that these commands assume that your installation files are in the Applications folder.

Catalina:
sudo /Applications/Install\ macOS\ Catalina.app/Contents/Resources/createinstallmedia –volume /Volumes/MyVolume
Big Sur:
sudo /Applications/Install\ macOS\ Big\ Sur.app/Contents/Resources/createinstallmedia –volume /Volumes/MyVolume
Mojave:
sudo /Applications/Install\ macOS\ Mojave.app/Contents/Resources/createinstallmedia –volume /Volumes/MyVolume
El Capitan:
sudo /Applications/Install\ OS\ X\ El\ Capitan.app/Contents/Resources/createinstallmedia –volume /Volumes/MyVolume –applicationpath /Applications/Install\ OS\ X\ El\ Capitan.app
High Sierra:
sudo /Applications/Install\ macOS\ High\ Sierra.app/Contents/Resources/createinstallmedia –volume /Volumes/MyVolume
- If prompted, enter your Mac’s password before moving on.
- When prompted to authorize erasing the USB drive, enter Y and hit Enter.
- After that, Mac’s installation files will be uploaded to the USB.
- A message saying “Copy complete and Done” will appear once the transfer is finished. You’ve now succeeded in making the macOS bootable installer on your USB stick. You can now remove the USB drive.
Note that the procedure to create the bootable installer differs between an Apple Silicon M1 Mac and a Mac powered by Intel.
Creating a Bootable Installer for Mac M1
- Connect your Mac to the USB drive that has bootable files.
- Start your Mac, holding the power button until the startup settings panel appears.
- Select the drive containing the bootable program and follow the Wizard’s instructions.
Creating a Bootable Installer for Intel-based Mac
- Connect your unbootable Mac to the USB drive that has bootable files.
- Restart and hold the Option/Alt key simultaneously.
- Choose the drive with the bootable installer and follow the Wizard’s instructions.
- You can recover the data from your backup after reinstalling OS X or macOS.
Method 4: Initiating Safe Mode Boot
In certain instances, your Mac’s inability to enter recovery mode might be attributed to problematic software during startup. Safely circumvent this situation by booting your Mac into Safe Mode, employing these guidelines:
- Begin by shutting down your Mac. Allow a ten-second pause after shutdown.
- Power on your Mac and simultaneously hold down the Shift key.
- Release the Shift key once the login screen emerges.
- Sign in to your Mac – you’ve successfully entered Safe Mode.
Safe Mode Boot for Apple M1 Mac
- Restart your Mac.
- Hold the Power button for about 10 seconds to access startup options.
- While holding the Shift key, select “Continue.”
- Safe Mode is now accessible.
- To evaluate the effects of Safe Mode, proceed to restart your Mac in Recovery Mode.
Method 5: Resetting the System Management Controller (SMC)
The System Management Controller (SMC) oversees crucial components like the CPU, fans, and batteries in your Mac. If the SMC is malfunctioning, it can hinder recovery mode startup. To address this, perform an SMC reset:
- Power off your Mac and disconnect it from power.
- Simultaneously press and hold the Control + Shift + Option + Power buttons for about ten seconds while reconnecting the power to your Mac.
- Try to restart your MacBook in recovery mode to determine if the issue has been resolved or persists.
Additional Solutions: Comprehensive Alternatives
When your Mac struggles to boot into Recovery Mode, there are further alternative solutions to consider. These approaches address more intricate issues that could be impeding your Mac’s recovery process.
Recover the Deleted Partition
If you suspect that the Recovery partition has been inadvertently deleted – possibly due to actions like using Boot Camp or altering the hard drive – you can attempt to retrieve it. Here’s how:
- Restart your Mac and quickly press Command (⌘) + R to access macOS Recovery.
- If Command (⌘) + R doesn’t initiate Internet Recovery Mode, try using Option (⌥)/Alt + Command + R instead.
- Utilize an Apple server to obtain the latest macOS version, allowing you to recover the potentially deleted partition.
Verify the Functionality of the Recovery Partition
In some cases, the macOS Recovery partition might vanish unexpectedly. To confirm its functionality, follow these steps:
- Turn off your Mac.
- Press the Power button while holding the Command (⌘) + R keys simultaneously.
- Keep these keys depressed until the Apple logo appears.
- Activate Recovery Mode on your Mac.
Make the Recovery Partition Visible: Reset SMC
The macOS Recovery partition might inexplicably disappear, but you can attempt to resolve this issue by resetting the PRAM or SMC:
- Shut down your Mac.
- Hold down the Command (⌘) + Option (⌥) + P + R keys as you boot up the computer.
- Release the keys after hearing the startup chime.
- Check whether the macOS Recovery partition reappears using the Command (⌘) + R method.
Examine Your Mac’s Recovery Partition via Terminal
To ascertain the presence of a Recovery partition on your Mac, you can use Terminal:
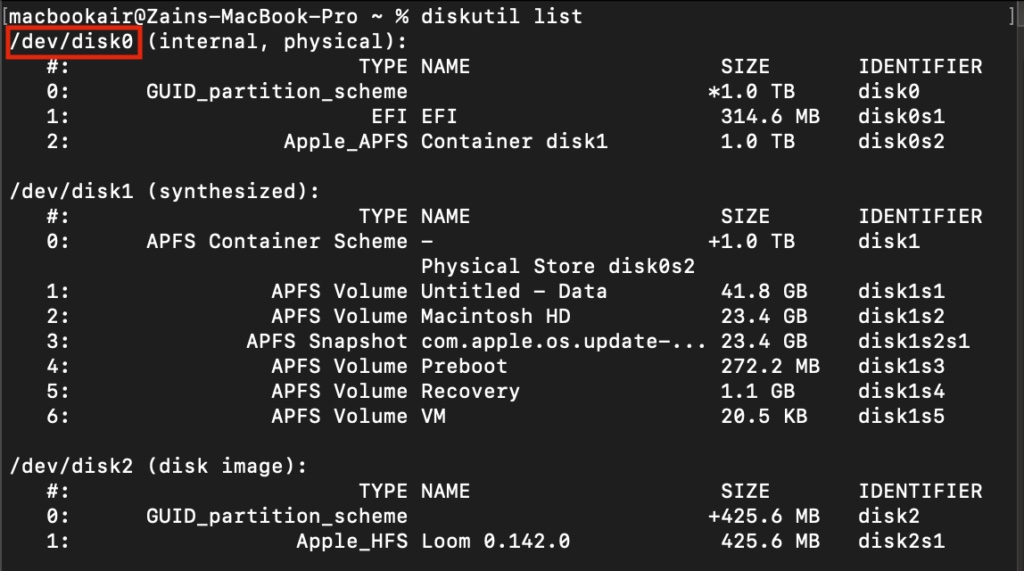
- Launch Terminal and input the command: diskutil list.
- A list of disks and partitions will be displayed.
- The macOS Recovery should be listed on the first drive (/dev/disk0).

Inspect Your Mac’s Keyboard Connections
If your Mac fails to boot into Recovery Mode, a malfunctioning keyboard might be the culprit. Confirm this by trying a different keyboard that is known to work on another Mac:
- Unplug your current keyboard.
- Connect a functional keyboard that is used with another Mac.
- If your Mac successfully boots into Recovery Mode, your original keyboard might be malfunctioning.
Frequently Asked Questions (FAQs)
What is Mac Recovery Mode?
How do I access Recovery Mode on my Mac?
Why is my Mac not entering Recovery Mode?
How can I restore my Mac to factory settings without using Recovery Mode?
Can I use an external keyboard to enter Recovery Mode on my Mac?
What should I do if my Mac freezes during the Recovery Mode startup?
Can I reinstall macOS without erasing my data from Recovery Mode?
Why is my Recovery Mode screen displaying a prohibitory symbol?
Can I use Recovery Mode to downgrade my macOS version?
What should I do if my Mac repeatedly fails to enter Recovery Mode?
Mastering Mac Recovery Mode
Mac Recovery Mode is your ally when troubleshooting and restoring your device. It offers solutions from macOS reinstallation to data recovery. Understanding its entry methods and alternative fixes empowers you to conquer issues. The FAQs shed light on its purpose. With this knowledge, you can confidently navigate and revive your Mac, ensuring a seamless macOS experience.

